Posted by The Home School in the Woods Team on
We’re back to share another timeless craft that’s been loved by a handful of different countries for centuries! Decoupage or découpage is an art form known for its one-of-a-kind vintage design. Its steps include cutting out paper, arranging them to your liking, and pasting them onto surfaces to create ornate patterns, pictures, and designs. Let’s learn more about the origins of decoupage, and how with just a few craft supply items, you can teach your child this historical craft!
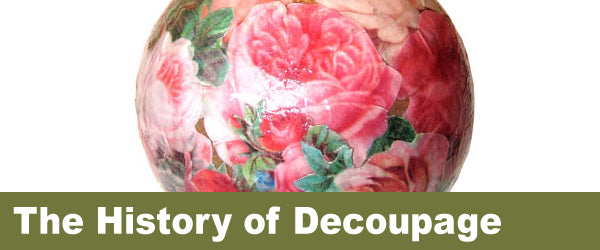
What Is Decoupage?
“Decoupage,” meaning “cutting out” in French, is an art form that involves cutting and gluing paper cutouts onto a wood, metal, or glass surface. From tables, chests, dressers, and bed frames to wastebaskets, hatboxes, lampshades, and screens – you can practically decoupage anything!
The cutouts used to create these can come from various artwork, wrapping paper, magazines, or manufactured decoupage paper. Once the papers are arranged, the artist pastes them on and applies several coats of varnish or lacquer. The item can be sanded and polished to create a more finished look.
The results of this simple cutting and gluing method are incredible, with results looking as though they’ve been professionally painted.
The Origins of Decoupage
Throughout history, many famous people have practiced the art of decoupage, including Marie Antionette, Lord Byron, Pablo Picasso, and more. But where exactly did this craft originate?
Decoupage has a long history that’s been influenced by a variety of countries. Long before decoupage made its debut in France, the art of paper cutting was being practiced and perfected all around the world.
Paper cutting is an art form that can be traced back to great empires like China, where colorful cutouts were used to decorate lanterns, windows, and boxes. Before that, paper cutouts were being used to decorate Eastern Siberian tombs.
Although we don’t know precisely where decoupage first showed up in history, it’s safe to say it originated from eastern cultures and was brought to Europe around the 17th century. It was here that it became popular to lacquer paper cutouts onto bookcases, cabinets, and other furniture for decoration.
Decoupage quickly spread throughout Europe and became a highly sought after oriental design. Famous decoupage artists of this time included Mary Delany (1700-1788), a friend of King George III and Queen Charlotte. At the age of 71, Mary began creating beautiful “paper mosaics” of flowers that could easily be mistaken as real. Her work can still be seen today at the British Museum.
By the Victorian era, magnificent decoupage designs were showing up everywhere. They taught decoupage to young women as a way to embellish objects of all kinds and display scraping projects, which was a popular hobby during that time.
Although decoupage fell silent for some time, it was brought back to life in the 20th century by Americans looking to preserve collages and decorate furniture. Today, many people decoupage their cell phone cases, wine bottles, coasters, ornaments, and so much more.
How to Decoupage
Decoupage continues to evolve year after year. With countless new styles and ideas emerging, you’re bound to end up decoupaging everything in your house! If you’re intimidated to start decoupaging, don’t be – it’s surprisingly easy and incredibly fun.
Luckily, most of the supplies you’ll need for decoupage are items you probably already have lying around your home. So, skip the decoupage kits and gather your own supplies.
Decoupage Supplies
- An item to decoupage (check out the web for decoupage ideas!)
- Pictures you’d like to decoupage with: these can be clippings from newspapers, magazines, posters, books, wrapping paper, cards, napkins – the list is never-ending!
- Cutting utensils like scissors or a crafting knife
- Glue such as Modge Podge or specialty glues specifically for decoupage
- Something to smooth the glue with – this can be a popsicle stick or a brayer, which is a miniature rolling pin for removing wrinkles and excess glue
- An item to spread the glue with like a paintbrush, sponge, or cotton swab
- Rags or paper towels to wipe away excess glue
- A sealing agent such as polyurethane, acrylic, epoxy, or other lacquers
- Sandpaper for finishing
Decoupage Instructions
- Clip out your pictures and arrange them on top of the surface you wish to decoupage. Make sure the surface is clean and free of dust.
- Glue your pictures in place. Smooth out wrinkles as you go.
- Varnish the pictures. This could take up to 15 coats depending on the thickness of your paper cutouts. Make sure the varnish is completely dry before adding another coat! We recommend sanding every few layers to get a professional lacquer finish. Just be sure to wipe away any dust before adding your next layer.
Decoupage For Kids
Decoupage isn’t just a fun and easy craft for adults; kids love it too! The best part about teaching your children this visual art form is that it combines admirably with history. You can use this project to accompany European history, the Victorian era, or 20th-century America.
We specifically include projects on decoupage in our Industrial Revolution Through the Great Depression study. This covers not only the history of decoupage but also simple DIY decoupage crafts you can do with your children – including holiday ornaments and a 3D paper tole decoupage project!
What Do You Plan on Decoupaging?
Thanks for tuning in and learning more about the history of decoupage. We’d love to hear your upcoming decoupage projects in the comments below! To keep reading articles from our Crafting Through the Ages series, check out The History of Penny Rugs, The History of Quilting, and National Sewing Month Explained.
Hello homeschoolinthewoods.com owner, Your posts are always on point.