
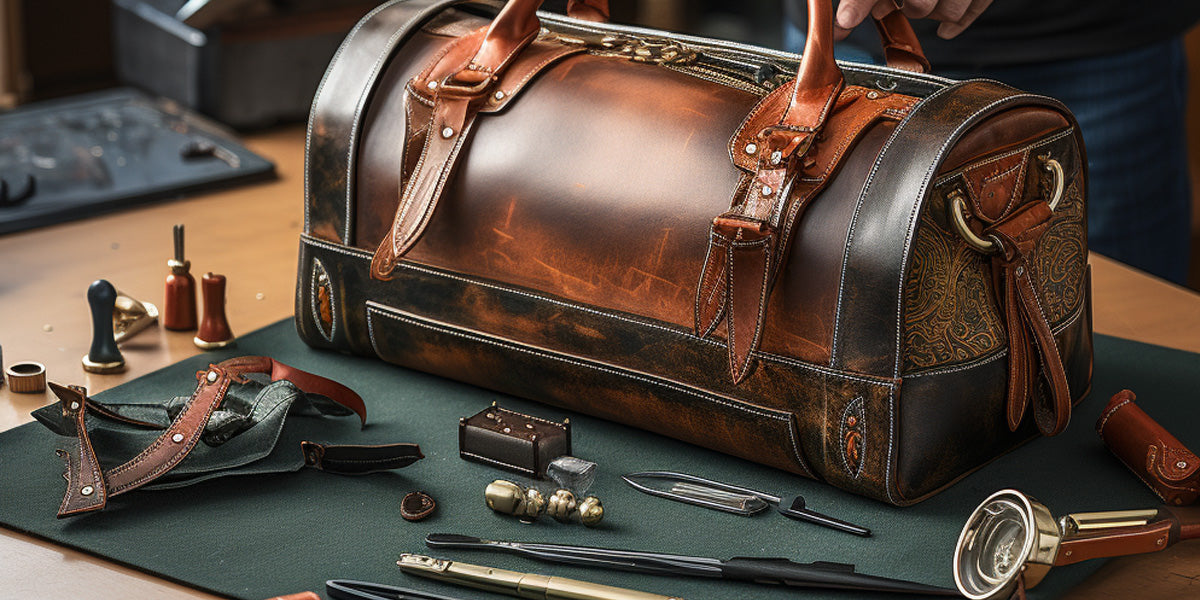
Leather products often become worn over time if you haven't looked after them.
But don't despair, you can restore them to get them looking almost brand new with a bit of effort.
In this guide, we'll help you restore your leather product yourself, in a simple to understand way:
| Step | Summary |
|---|---|
| Preparing your leather |
|
| Fixing the surface of your leather |
|
| Repairing small scratches in leather |
|
Does this seem like a lot of work? It may be easier for you to just buy a new leather bag - browse our range at Vonbaer.com.
How To Store Leather Step by Step

Preparing your leather
Firstly, get your cleaning materials ready. You’ll need to clean the leather before you start conditioning it to ensure dirt and grime aren’t locked into the material whilst you’re moisturizing it.
- Prepare your cleaning materials, including a small basin or bucket.
- Gather a mix of dishwashing soap and warm water in the basin or bucket (ratio: 1 part soap for every 8 parts water).
- Consider purchasing saddle soap, which contains ingredients like beeswax to make the leather more supple while cleaning. Note that wax and oil can interfere with compound and filler adhesion.
- Use a small amount of soap to prevent buildup on the leather.
Add a mix of dishwashing soap and warm water to a small basin or bucket. The ratio should be one part soap for every eight parts water. Another step you can take is to buy saddle soap, which comes with ingredients such as beeswax that can make your leather more supple whilst you’re cleaning it. Just remember that wax and oil can stop compounds and filler from correctly adhering to your leather. To prevent buildup on your leather, use a small amount of the soap.
- Mix dishwashing soap and warm water in a small basin or bucket (ratio: 1 part soap for every 8 parts water).
- Consider using saddle soap with caution, as it contains ingredients like beeswax that can enhance leather suppleness.
- Note that wax and oil can interfere with compound and filler adhesion on leather.
- Use a small amount of soap to prevent buildup on the leather.
You can remove dry dirt and dust by rubbing the surface of the leather with a soft and damp cloth. You then need to lather the surface. You can either dip a soft, lint-free cloth into the solution, or you can dip the cloth into warm water then add a small amount of saddle soap. You’ll need to wring the cloth out lightly before wiping down the damaged surface of the leather. Use firm, circular motions. Rinse then repeat.
- Rub the surface of the leather with a soft and damp cloth to remove dry dirt and dust.
- Lather the surface using either the soap solution or warm water with a small amount of saddle soap.
- Lightly wring the cloth before wiping down the damaged leather surface using firm, circular motions.
- Rinse the cloth and repeat the process if necessary.
If you need to remove deep stains from pigmented leather, you can dilute rubbing alcohol. This can then be rubbed into the leather using a lint-free cloth. Do a patch test on an inconspicuous area first to prevent the leather from staining. You should then rinse thoroughly. Once you’ve rinsed your cloth, dip it into cool, clean water. Lightly wring out your cloth and run it across the leather surface once again. Ensure all soap is removed from your leather.
- Dilute rubbing alcohol to remove deep stains from pigmented leather.
- Rub the diluted rubbing alcohol into the leather using a lint-free cloth.
- Perform a patch test on an inconspicuous area to prevent staining.
- Rinse the leather thoroughly after applying rubbing alcohol.
- Rinse the cloth and dip it into cool, clean water.
- Lightly wring out the cloth and run it across the leather surface to remove any remaining soap.
- Ensure all soap is removed from the leather.
Allow your leather to dry. Once the leather has been rinsed thoroughly, enable it to air dry. Don’t use a blow dryer, heater, or similar heat source to quicken drying time as heat can leave your leather misshapen and stiff.
- After rinsing the leather thoroughly, allow it to air dry.
- Avoid using heat sources like blow dryers or heaters to speed up drying, as they can misshape and stiffen the leather.
Fixing the surface of your leather
- Purchase a leather repair kit. You can buy these at many places online and offline.
- If you only have a small scratch on soft leather, you may be able to repair this by rubbing the surface of your leather in circular motions using your index finger.
- To avoid making a mess, you can lay down items such as towels, plastic sheeting, and newspaper underneath your leather object. Use protective gloves and old clothes during the repair process. To avoid being affected by fumes from repair products, keep your windows open or apply the treatment outdoors.
- Apply a leather repair compound. With a sponge, gently spread a thin layer or leather binder over the surface of your leather. Leather binder will seep into your leather fibers and bind them together. Allow the leather to air dry and repeat this process up to five times or until you’re happy with the outcome. If any excess binder has accumulated around the seams, remove this.
- You can then apply a thin coat of colorant to a sponge or foam applicator. Apply a thin coat of it to your leather and focus on difficult-to-reach parts like seams, creases, and cracks. Allow half an hour for the colorant to dry. You’ll need to shake the colorant well to ensure it’s mixed efficiently prior to using it.
- You can then spray more colorant with an airbrush or spray gun. Spray very fine coats onto the leather to prevent oversaturation or runs. Let the surface dry and repeat the process until you feel the surface is covered accurately.
- Once your leather is dry, you can use a soft, lint-free cloth to apply a leather conditioner. Apply the conditioner evenly and ensure the whole surface is covered. You can buff and polish the leather gently to ensure it’s shiny and supple.
Repairing small scratches in leather
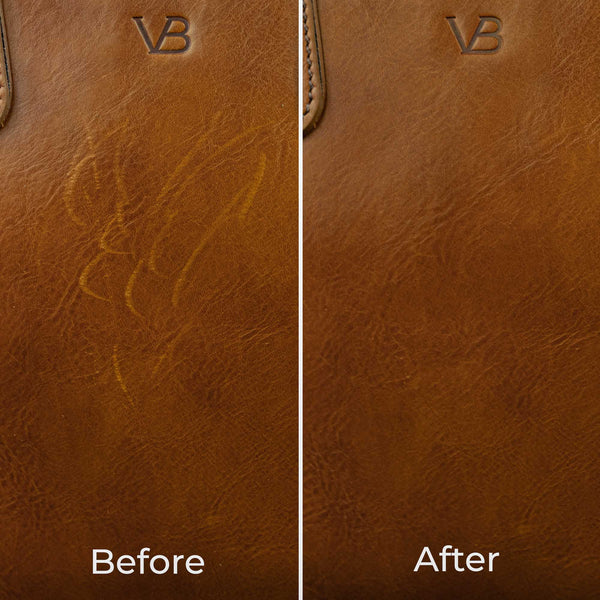
The best way to repair leather scratches is to wipe in a conditioner, like this Premium Leather Cream, which is made from all of the right ingredients to care for your real leather product.
If you prefer a DIY method, then here are some:
Repairing small scratches in leather by treating it with vinegar:
- Apply a modest amount of distilled white vinegar with a small cloth or a Q-tip.
- The vinegar will cause the scratched area to swell up.
- Allow it to dry.
- Buff the area in question with colorless shoe polish.
Rubbing the scratch with orange oil or olive oil:
- Use a damp cloth to rub orange oil or olive oil into the scratch and the areas surrounding it using buffing motions.
- This will also condition your leather.
- Try not to use a large amount of oil as too much of it can deteriorate your leather over time.
Using a blowdryer to treat the scratch:
- Switch your blowdryer to a medium setting.
- Add the heat to the scratched part of your leather.
- Rub the scratch with your free hand.
- The heat is likely to bring dyes that were applied to the leather during the tanning process back to the surface so the scratch is less visible.
What preventative measures can I take?
It’s important to take proactive measures if you want to prevent damage and extend the lifespan of your leather products.
Taking these steps will help you keep your leather items in good condition.
Use leather protectants
Apply high-quality leather protectants or conditioners which can help you create a barrier against UV damage, stains, and moisture.
Seek out a product that’s specifically designed for the kind of leather you’re working with.
Avoid direct sunlight
Exposure to direct sunlight can leave your leather dried out, faded, and cracked. Keep your treasured leather items away from windows.
You can also keep sunlight exposure to a minimum via the use of blinds, UV-protective films, and curtains.
Proper storage
When you’re not using them, store your leather items in a cool, dry place. This will help you prevent issues with excessive moisture, mildew, and mold. Don’t store leather in plastic bags.
These tend to trap moisture and therefore cause leather deterioration. Use dust bags or breathable fabric instead.
Regular cleaning
Dust and debris can settle on leather surfaces and cause abrasion. Wipe down your leather items regularly with a soft, dry cloth so you can maintain the appearance of your leather items and remove dust.
Types of leather
Knowing about the different kinds of leather and the specific care they need can help you restore them effectively.
Full-grain leather
This is the highest quality type of leather available, and the most durable. It retains its grain layer, which gives it strength and natural beauty.
Over time, your full-grain leather product will develop a unique patina which will add to its charm.
To restore this kind of leather, follow the manufacturer’s instructions and don’t use harsh chemicals which may damage the natural texture of the material.
At Von Baer, we only use full grain leather in our bags, so you know you're getting the best quality possible.

Top-grain leather
This leather is similar to full-grain leather but has a smooth surface. The top layer is removed. It’s more stain and scratch-resistant but needs regular conditioning to keep it supple and stop it from drying out.
Bonded leather
This kind of leather is a blend of shredded leather scraps and adhesive, bonded leather. It is less durable than the types of leather discussed above and can flake and peel.
As it’s made from synthetic content, classic restoration methods don’t always work so effectively. If you need help with repairing a bonded leather product, you may wish to have it reupholstered by an experienced professional.
Corrected-grain leather
This kind of leather is sanded or buffed so imperfections can be removed. An artificial grain is embossed on the surface. Restoration techniques for this kind of leather should concentrate on preserving the applied finish whilst ensuring discoloration and scratches are addressed.
By developing an understanding of the kind of leather you’re treating, you can select the best restoration methods and products for your needs.
Related articles:
- Repair cat scratches on leather
- Remove water stains from leather
- Clean leather wallet & remove stains/smells
- Remove ink from leather
- Get smell out of leather
- Remove stains from leather shoes
- Clean suede leather bag
- How to reform a leather bag
- How to maintain leather bags
- Repair cracked leather
- Wet leather
Deep cleaning techniques
If you have stubborn stains or dirt that’s deeply embedded into your material, standard cleaning methods may not be good enough.
Let’s take a look at some of the deep cleaning methods you may be able to opt for if you need to restore your leather.
pH-balanced leather cleaners
These cleaners can remove oils, dirt, and stains without damaging your leather. Just make sure your leather is a suitable match for this product.
These cleaners are gentle on the materials they are designed to work with.
Leather shampooing
If your leather is heavily soiled, leather shampooing could be the solution. Take a look at the manufacturer’s instructions and dilute the shampoo with water accordingly.
You can use a sponge or a soft brush to gently scrub at the leather surface. You can then rinse using a clean, damp cloth and enable the leather to air dry.
Steam cleaning
Steam cleaning can be a good match for products like top-coated leather and pigmented leather.
Just remember to use a professional-standard steam cleaner that’s been specifically designed to work with leather.
Comply with the manufacturer’s instructions and carry out a patch test on an inconspicuous area before you begin.
Leather stain removal
If you have ink or grease stains on your leather, the material may require a specialized stain removal technique.
Test out any stain remover on an inconspicuous area first to make sure it won’t damage or discolor your material.
You can apply your stain remover gently with a soft cloth or a cotton swab. Start working from the outer edges and make your way towards the center of the stain.
You then need to blot the area using a clean cloth. Keep repeating these steps until you have removed the stain.
Professional leather cleaning
If you’re dealing with particularly delicate or valuable items, you may wish to use a professional leather cleaning service.
These professionals have the experience, expertise, and resources to deep clean and restore your leather without damaging it.
They can use their skills to work with delicate finishes and intricate details to give you the best outcome possible.
Choose the right conditioner
It’s vital to opt for the right conditioner if you want to maintain the hydration, suppleness, and general health of your leather.
Think about these factors when you’re choosing a conditioner.
Leather type
The requirements of your leather product will depend on the kind of leather it’s made from.
Aniline leather needs a conditioner that won’t change its natural appearance, but full-grain leather is best treated with nourishing conditioners that ensure its natural oils are retained.
Talk to the product manufacturer or a leather care expert to find the right solution for your needs.
Again, we recommend you check out this Premium Leather Cream.
Water-based vs oil-based
Conditioners are available in oil-based and water-based formulations. Whilst water-based conditioners tend to be lighter and easier to apply, they may not give you the same kind of deep nourishment as you’ll get from an oil-based solution.
Oil-based conditioners are richer and able to penetrate the leather fibers. However, they can cause some kinds of leather to become darkened.
Think about the pros and cons of each and opt for the type which seems the most suitable.
Test on a small area
Prior to applying conditioner to the whole leather surface, test it on a small, inconspicuous area to make sure it doesn’t give you any negative effects like greasiness or color changing.
This is particularly vital if you’re working with vintage or delicate leather goods.
Conditioning your leather regularly will help you maintain its integrity and stop cracking and drying whilst ensuring it stays looking fantastic over time.
Related pages:
- How to clean leather bag
- How to restore faded leather bag
- How to stretch leather
- How to shrink leather
- How to soften leather
- How to wash leather
- How to fix faux leather peeling
- Bleach On Leather
- How To Fix Scuffed Leather
- How To Stiffen Leather
Beyond the surface level
In some scenarios, you may need more than a typical DIY repair will give you. Let’s take a look at some of your options right now.
Professional repair services
If you’re dealing with sentimental or high-value leather items, it may be best to use a professional leather repair service.
These seasoned professionals have the skills and resources needed to carry out demanding repairs and can help you overcome problems with intricate stitching as well as structural damage and extensive tears.
Reupholstering
Perhaps your leather has become severely damaged? Maybe it looks worn out or outdated? If so, you may wish to consider reupholstering your item.
The reupholstering process involves replacing damaged leather with new material to breathe brand-new life into it.
Look for a highly experienced upholstery who has worked with leather for many years to get the best results.
Leather recoloring
If your leather has started to fade or the color is no longer even, recoloring may be your best option. In this process, special dyes and colorants can be used to restore or change the color of the leather.
Recoloring can be a difficult task, which means it may be best to consult the experts to get the right outcome, particularly if multi-toned leathers or intricate patterns are involved.
Talk to leather restoration experts
Leather restoration specialists have detailed knowledge of various kinds of leather and the best techniques for restoring them. They also have access to special tools and materials.
They can take a close look at the condition of your item and make the right recommendations to give you the best outcome possible.
Historical preservation
If you have historical or antique leather items to restore, it’s vital that their cultural value is maintained.
It may be best to speak to a historical preservation and restoration specialist to ensure the process meets the general principles of conservation and won’t compromise the credibility, authenticity, or integrity of the piece.
A specialist can give you long-lasting results and preserve the character and value of your items.
Related pages:
- Leather
- Leather guide for beginners
- Vegetable tanned leather
- Where does leather come from
- Leather grades
- How is leather made
- Italian leather
- How to tell if leather is real
- What is Real Leather
Maintenance and regular care tips
Once you’ve restored your leather items, you’ll need to establish a maintenance regime to protect their condition.
You can apply a weather-resistant protection spray to your goods, especially if they are likely to come into contact with the elements. This will defend them from stains, moisture, and UV damage.
You can reapply the spray every three months or as often as the manufacturer recommends.
Prevent excessive moisture
Leather can become damaged when it’s exposed to excessive moisture. Try not to use items made from leather in heavy rain or snow. If they do get wet, try to dry them quickly.
A clean absorbent cloth can be used to blot moisture away. Let the leather air dry naturally. Try not to use direct heat sources as they can leave your leather cracked or warped.
Regular cleaning and conditioning
Establish a routine for cleaning and conditioning your leather goods. You can use a soft, dry cloth to wipe them down and remove debris and dust from them.
Every so often, apply a leather conditioner to replenish the moisture of your leather and retain the suppleness. Pay close attention to the manufacturer’s instructions to find out how often you should condition the product.
By making these maintenance practices part of your leather care routine, you keep your restored leather item looking beautiful for years to come.
Von Baer: Luxurious Italian Leather Products

For when only the highest quality leather will do, choose Von Baer.
Our products are defined by Italy’s finest full-grain leather, pure luxury.
Handmade by experienced craftsmen with decades of experience.
An investment in something beautiful that you'll treasure for years to come.
Conclusion
We hope you enjoyed our article on how to restore leather.
If you have any questions or comments, contact us at info@vonbaer.com, or leave them in the comments.
Want to read more? Check out our Leather pages.
Related articles:
- How To Clean Mold off Leather
- How To Clean Faux Leather
- How To Repair Leather
- Leather Burning
- Best Leather Cleaners & Conditioners
- How To Get Sharpie off Leather
- How To Clean Suede
- DIY Leather Conditioner
- Wet Molding Leather
- Best Leather Oil
- How To Clean White Leather
- How To Get Oil Out of Leather
- Clean Leather Car Seats


Leave a Comment
Your email address will not be published.